
Set up GPS tracking
To double-check that the tag was scanned at the location, you can setup GPS tracking of the user's device and geofencing. This way you can see when the device enters or exits locations or sites.
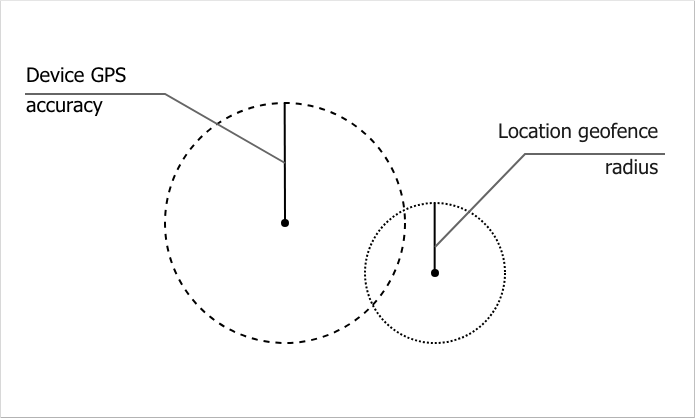
Locations and sites are defined by geocoordinates and the geofence radius. The user's geocoordinates are added with the GPS accuracy radius. When the two circles meet, the Reslink system assumes that the user is inside the location or site.
To set up GPS tracking:
-
Make sure you have set up:
Enter the location coordinates in the web service or activate it in the app.
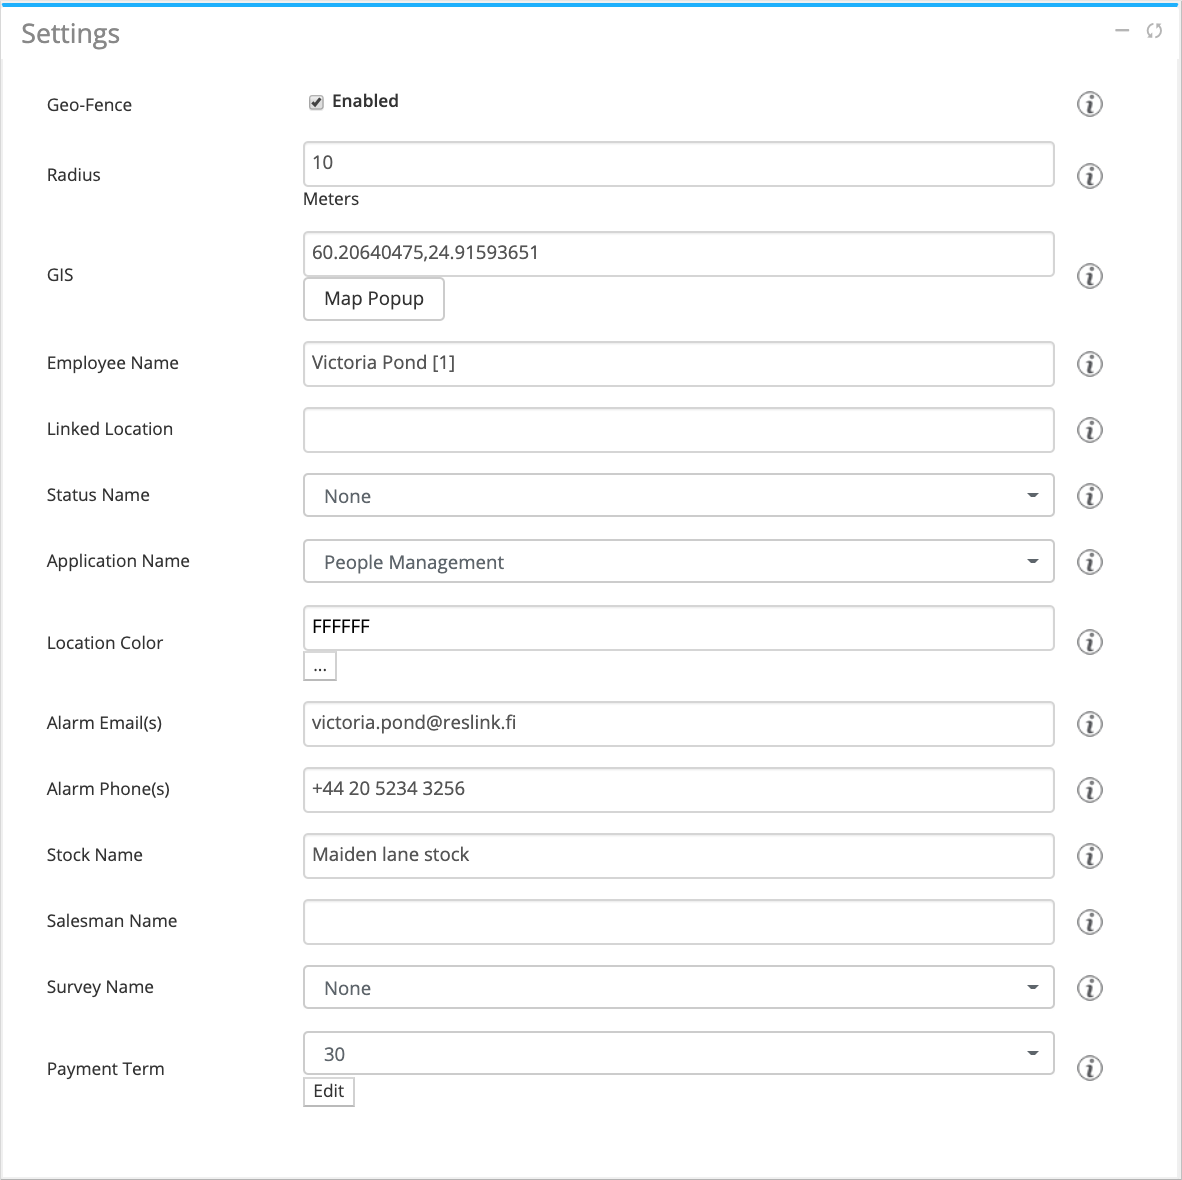
In the web service: go to the page. Enter the coordinates in the "latitude, longitude" format (for example, 41.049263,29.026119) in the GIS field (Settings block) or choose the place on the map.
In the app: Go to the spot, choose and enter Location ID.
-
Define the geofence radius for locations.
Go to the page. Tick the Geo-fence checkbox and enter the value in meters.
Enable GPS tracking for users.
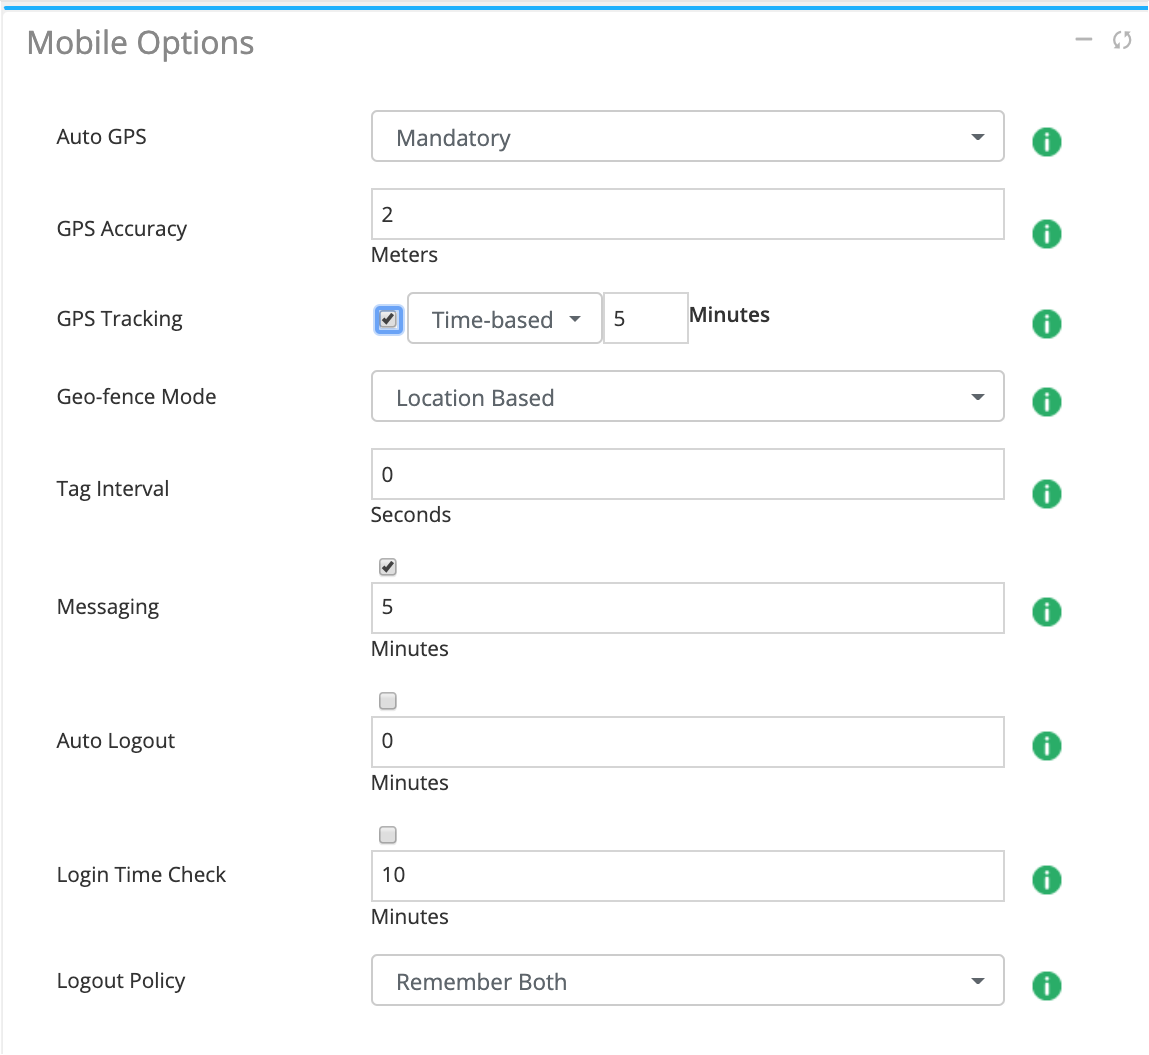
Go to the page. Set the Auto GPS option to "Mandatory" and tick the GPS tracking checkbox.
-
Choose where you want to track the user's device (locations or sites).
Go to the page. Set the Geo-fence mode field to "location-based" or "site-based".
The GPS tracking is set up. You can now view the employee's position on the map and set up tracking alarms.