
Template Builder
Prerequisite
|
Access level to the Web Backend |
Manager and above |
|
Access to the Application Builder |
Version 3.10+ |
|
Access to Mobile Application |
Android version 3.2801 and above iOS 3.2000 and above |
|
Access for login to the Mobile Application |
Any user level |
Create a form
Login to the backend with your credentials and go to Define > Applications. Click Launch Java Web Start and run the downloadable executable file. Create an application with a form that fits your needs using this guide. Create a streamer and download the app on your mobile phone using these instructions.
Send a transaction (Mobile)
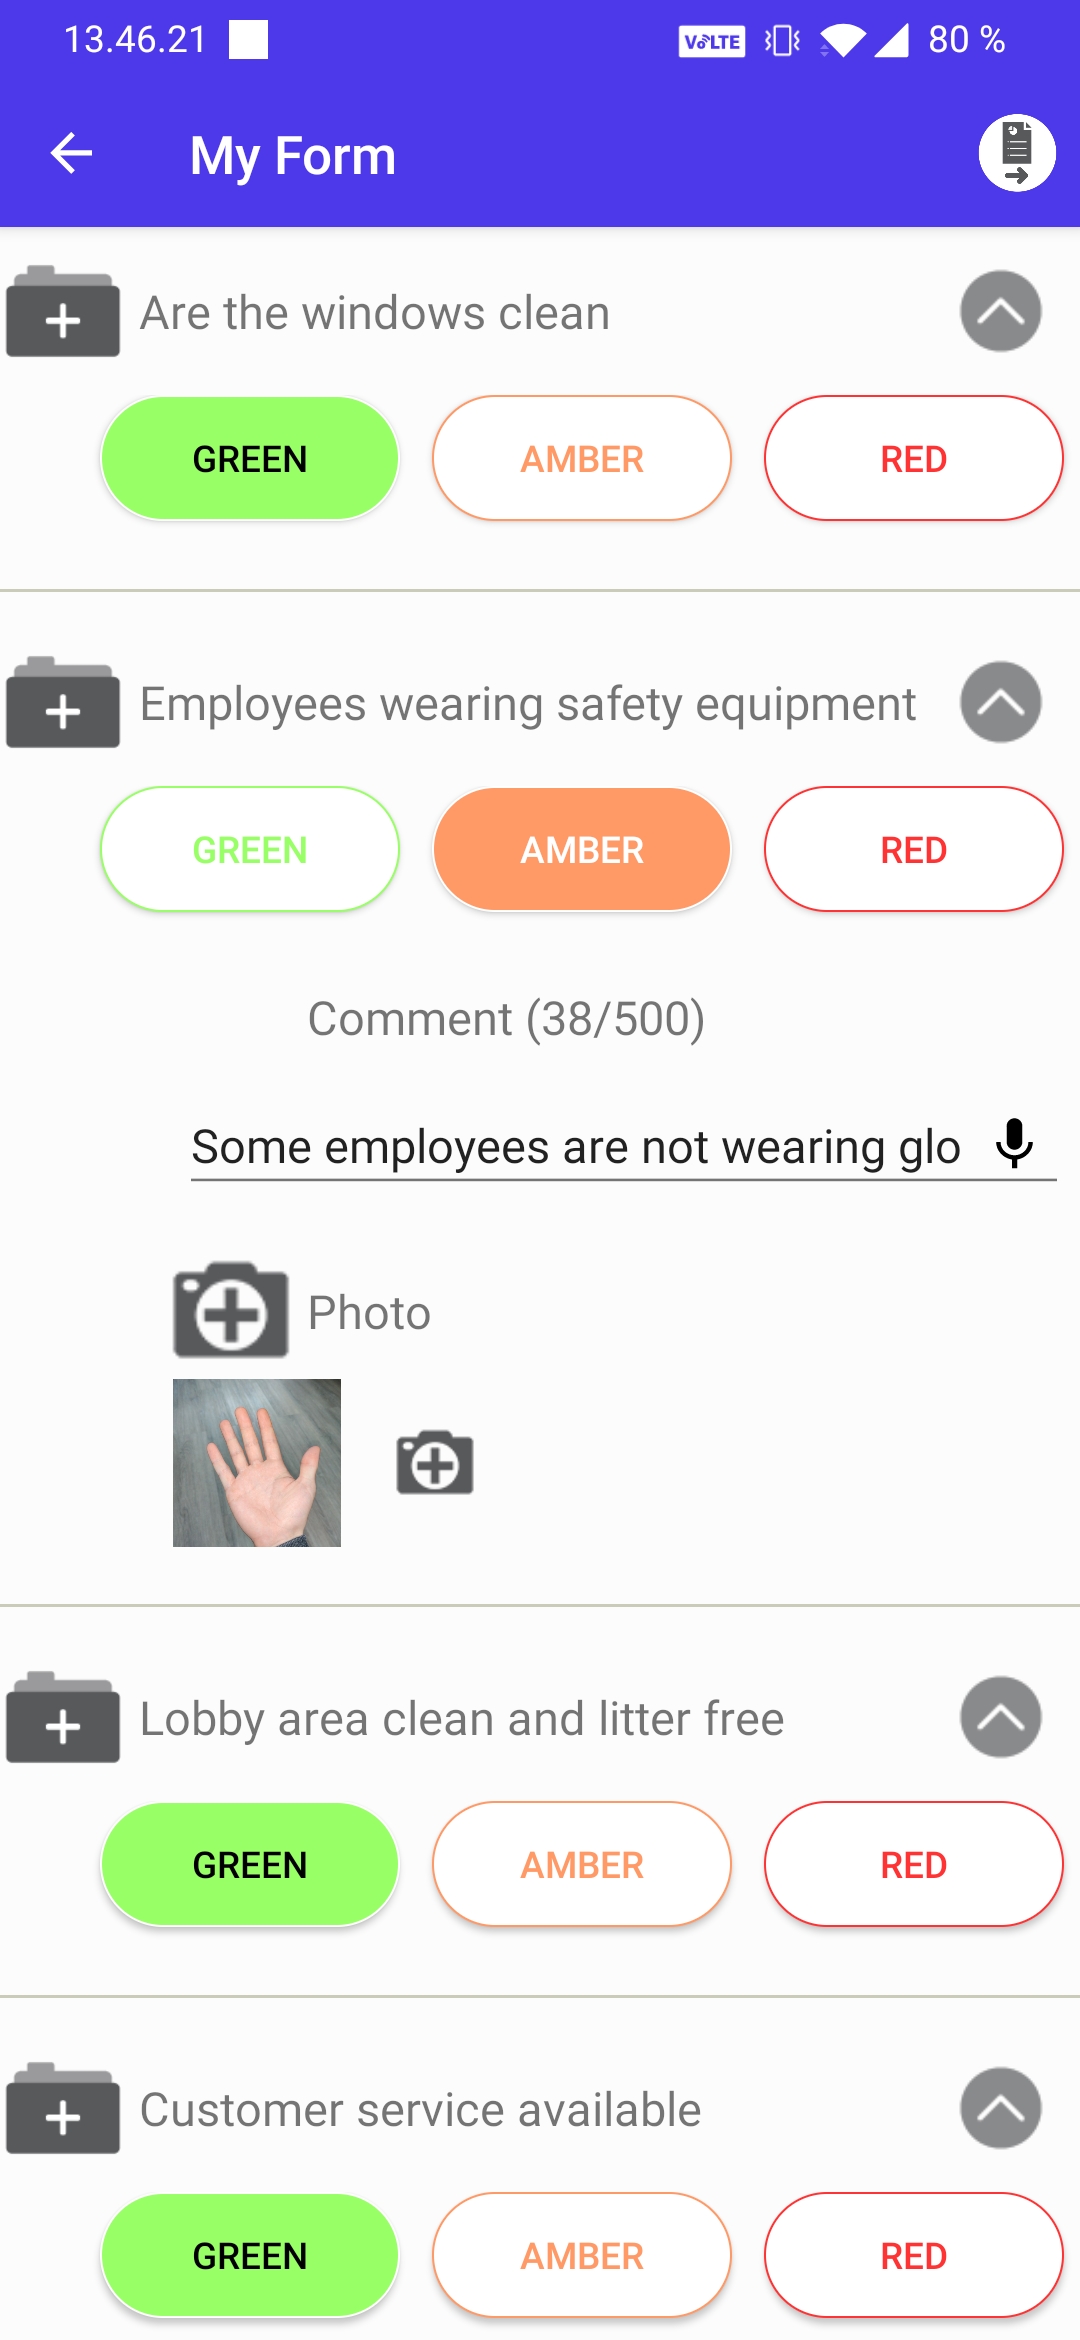
Login to your newly created application using the credentials created in the backend. Navigate to the form, fill the requested fields and tap “Submit” or the Send-icon in the top-right corner of the screen. The data will be sent to the backend.
Create a PDF-template
In the backend navigate to Template Builder >Basic Template Builder/Advanced Template Builder. Pick the form from the Form Name -dropdown menu. To create a new template and save it for future use, click PDF-name and choose Add New to give the template a name. If you have previously created templates for the same form they will be found in the PDF-name -menu. Choosing an existing template will populate the fields as they were saved, allowing the user to edit the template.
Choose the number of Sections you wish to have in your PDF. Sections allow the user to split the transaction into multiple sections that all have their own header for better readability and organization. For example, if the form includes data from multiple different rooms, the sections could be named after the room and the corresponding data should only be shown under each room. Choosing the fields will be guided later in this document.
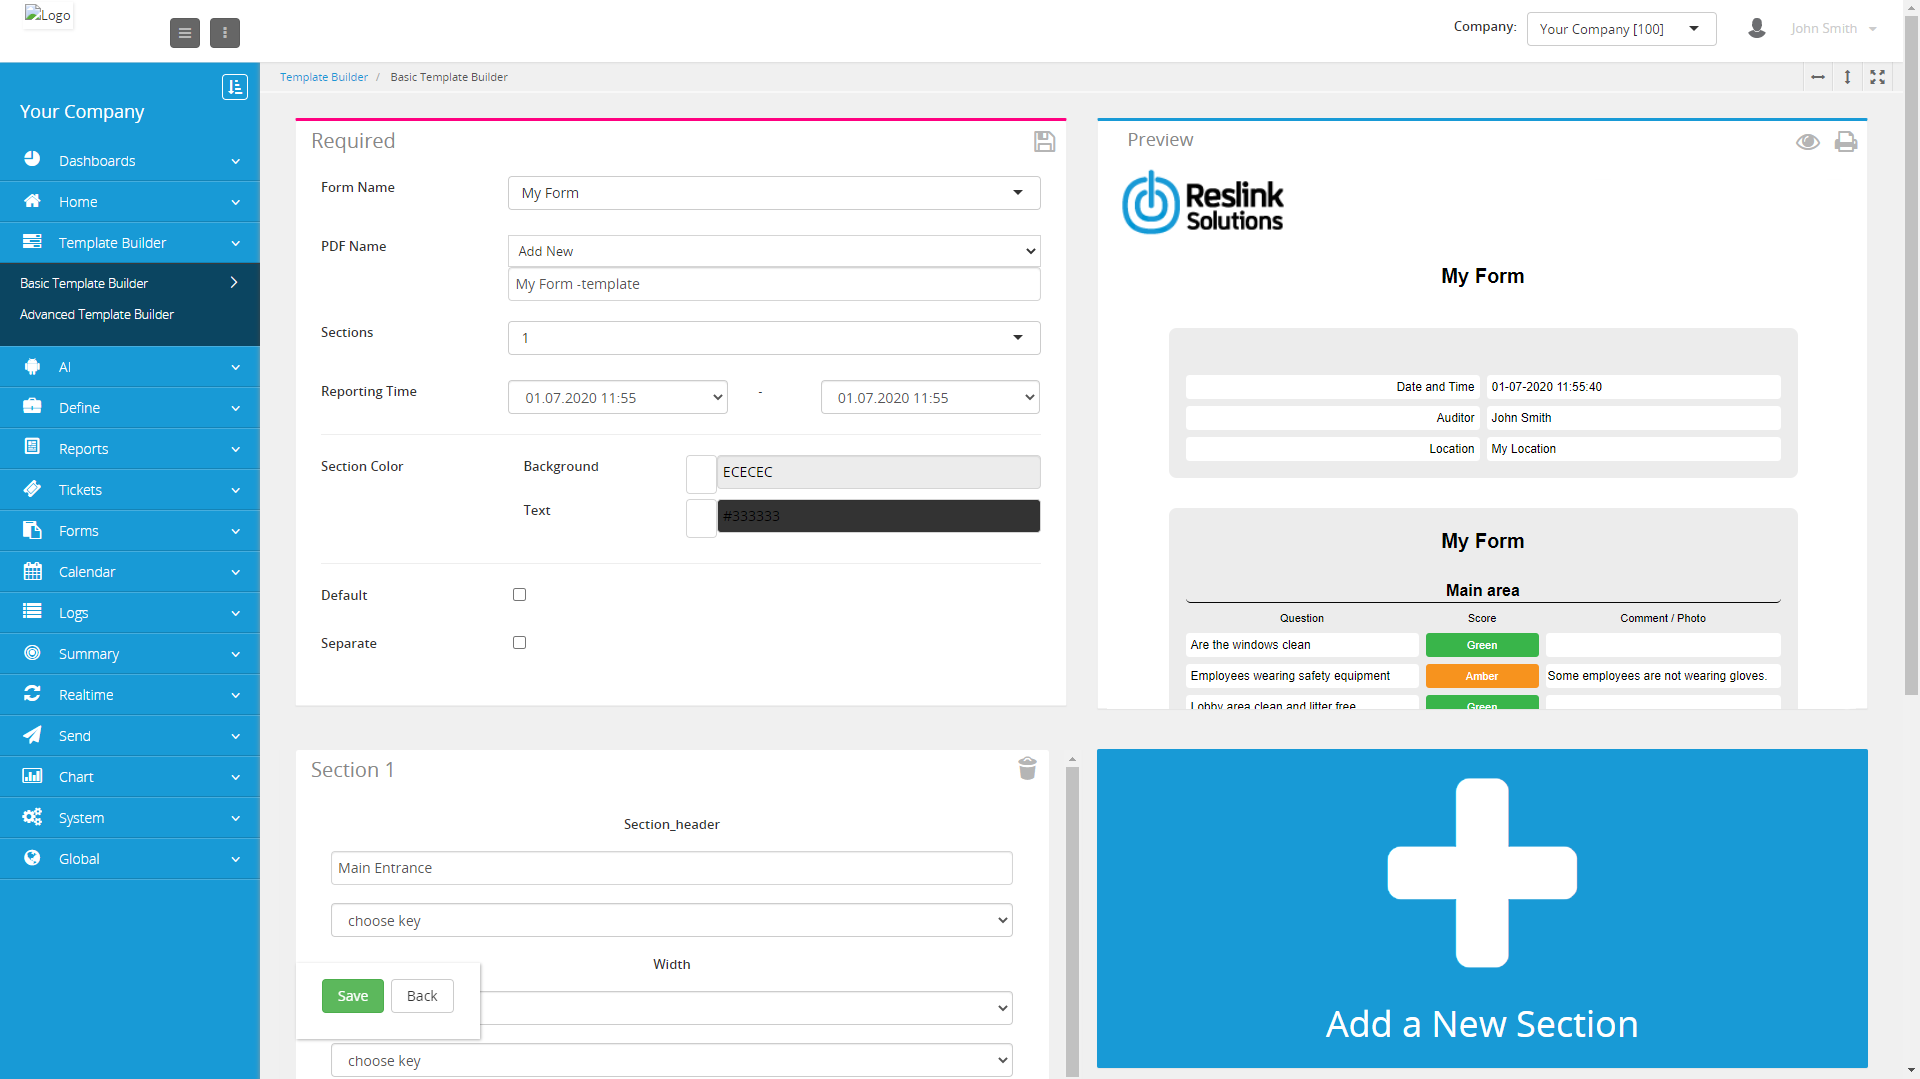
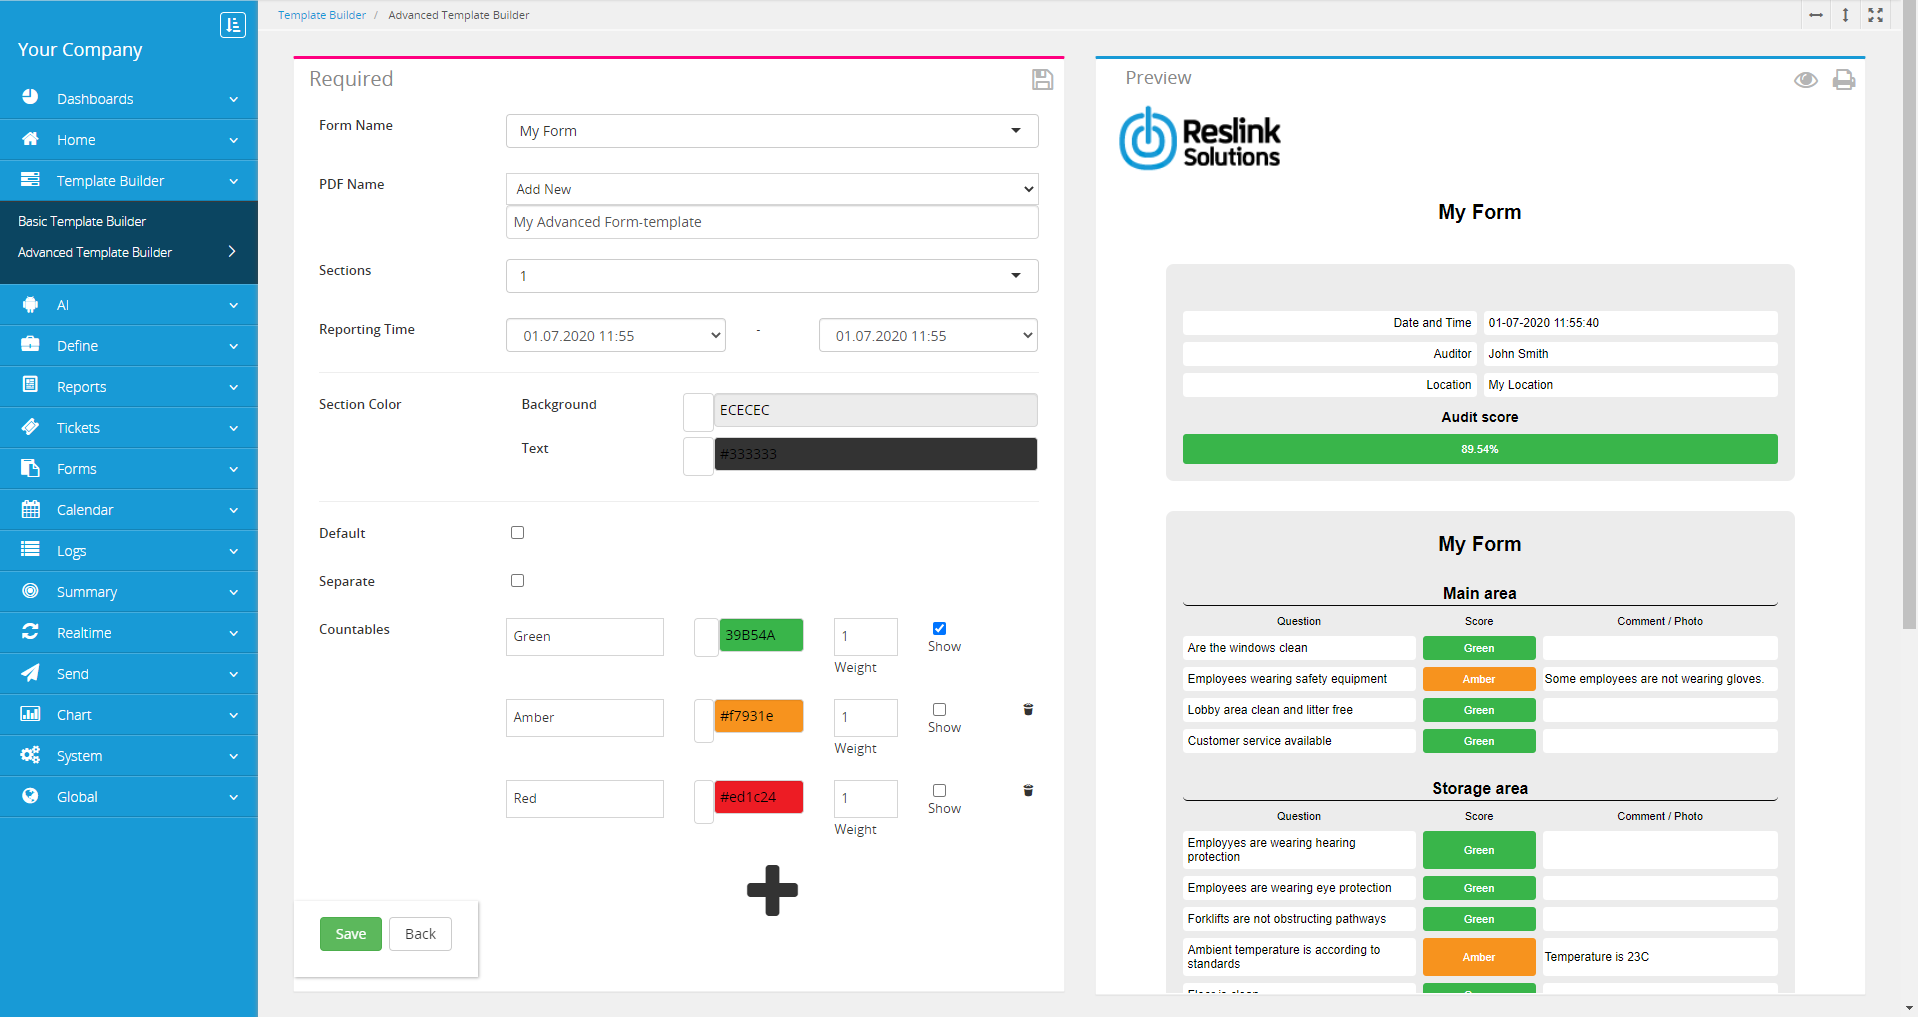
Pick your transaction from Reporting Time -menu. If you want to export multiple transactions to the same PDF, pick the timespan in the Reporting Time -menu to include each transaction that is included within the chosen dates.
To choose the background and text color use the color pickers respectively in the Section Color.
Enable Default to make this template the default. If a template is set as a default, it will be used for exporting and Form Name will be automatically populated when the user navigates to the Template Builder.
If you have multiple transactions in the PDF-template, enabling Separate will split the transactions to their respective sections.
Each section has an input field to choose the Header shown in the section. You can change the Width of each individual section.
To choose which fields to include in the PDF choose the desired fields from the dropdown-menu and choose the optional child-nodes to include them in the PDF. To add more fields, click + Add key value pair to section. Alternatively click Choose All to automatically include everything in the report. After the fields have been populated, you can go through the fields and disable those that should not be included.
To preview the PDF, click the Eye-icon in the Preview-section. By clicking the Printer-icon in the Preview-section you can download the chosen transaction(s) as a PDF-file.
If the preview is not as expected or the form has properties that cannot be automatically exported into a PDF, the PDF-template can be manually developed by the Reslink team.
Data such as Date and time and the User which was used to send the transaction will be automatically added to the top of the section in the PDF.
To save the template, click the Save-button found in the bottom-left corner. To cancel the creation, click Back.