
Manage real-time popups
You can set up pop-ups that appear in the Realtime view as soon as some event happens (for example, the user left the location where they should stay). The pop-ups are configured for the whole company – that means, other managers who use the web service will also see them. The pop-up prompts you to resolve the alarm – that is, find out what the situation is, enter the reason, comment and close the case.
Set up the popups
To set up the pop-up alarms:
-
Go to and click Add new.
Specify the triggering transaction in the Alarm name field.
Each transaction has data fields (Data 1, Data 2, Data 3, Data 4). The content of these fields is defined in the application. You can view them in the Transactions report (), for example:
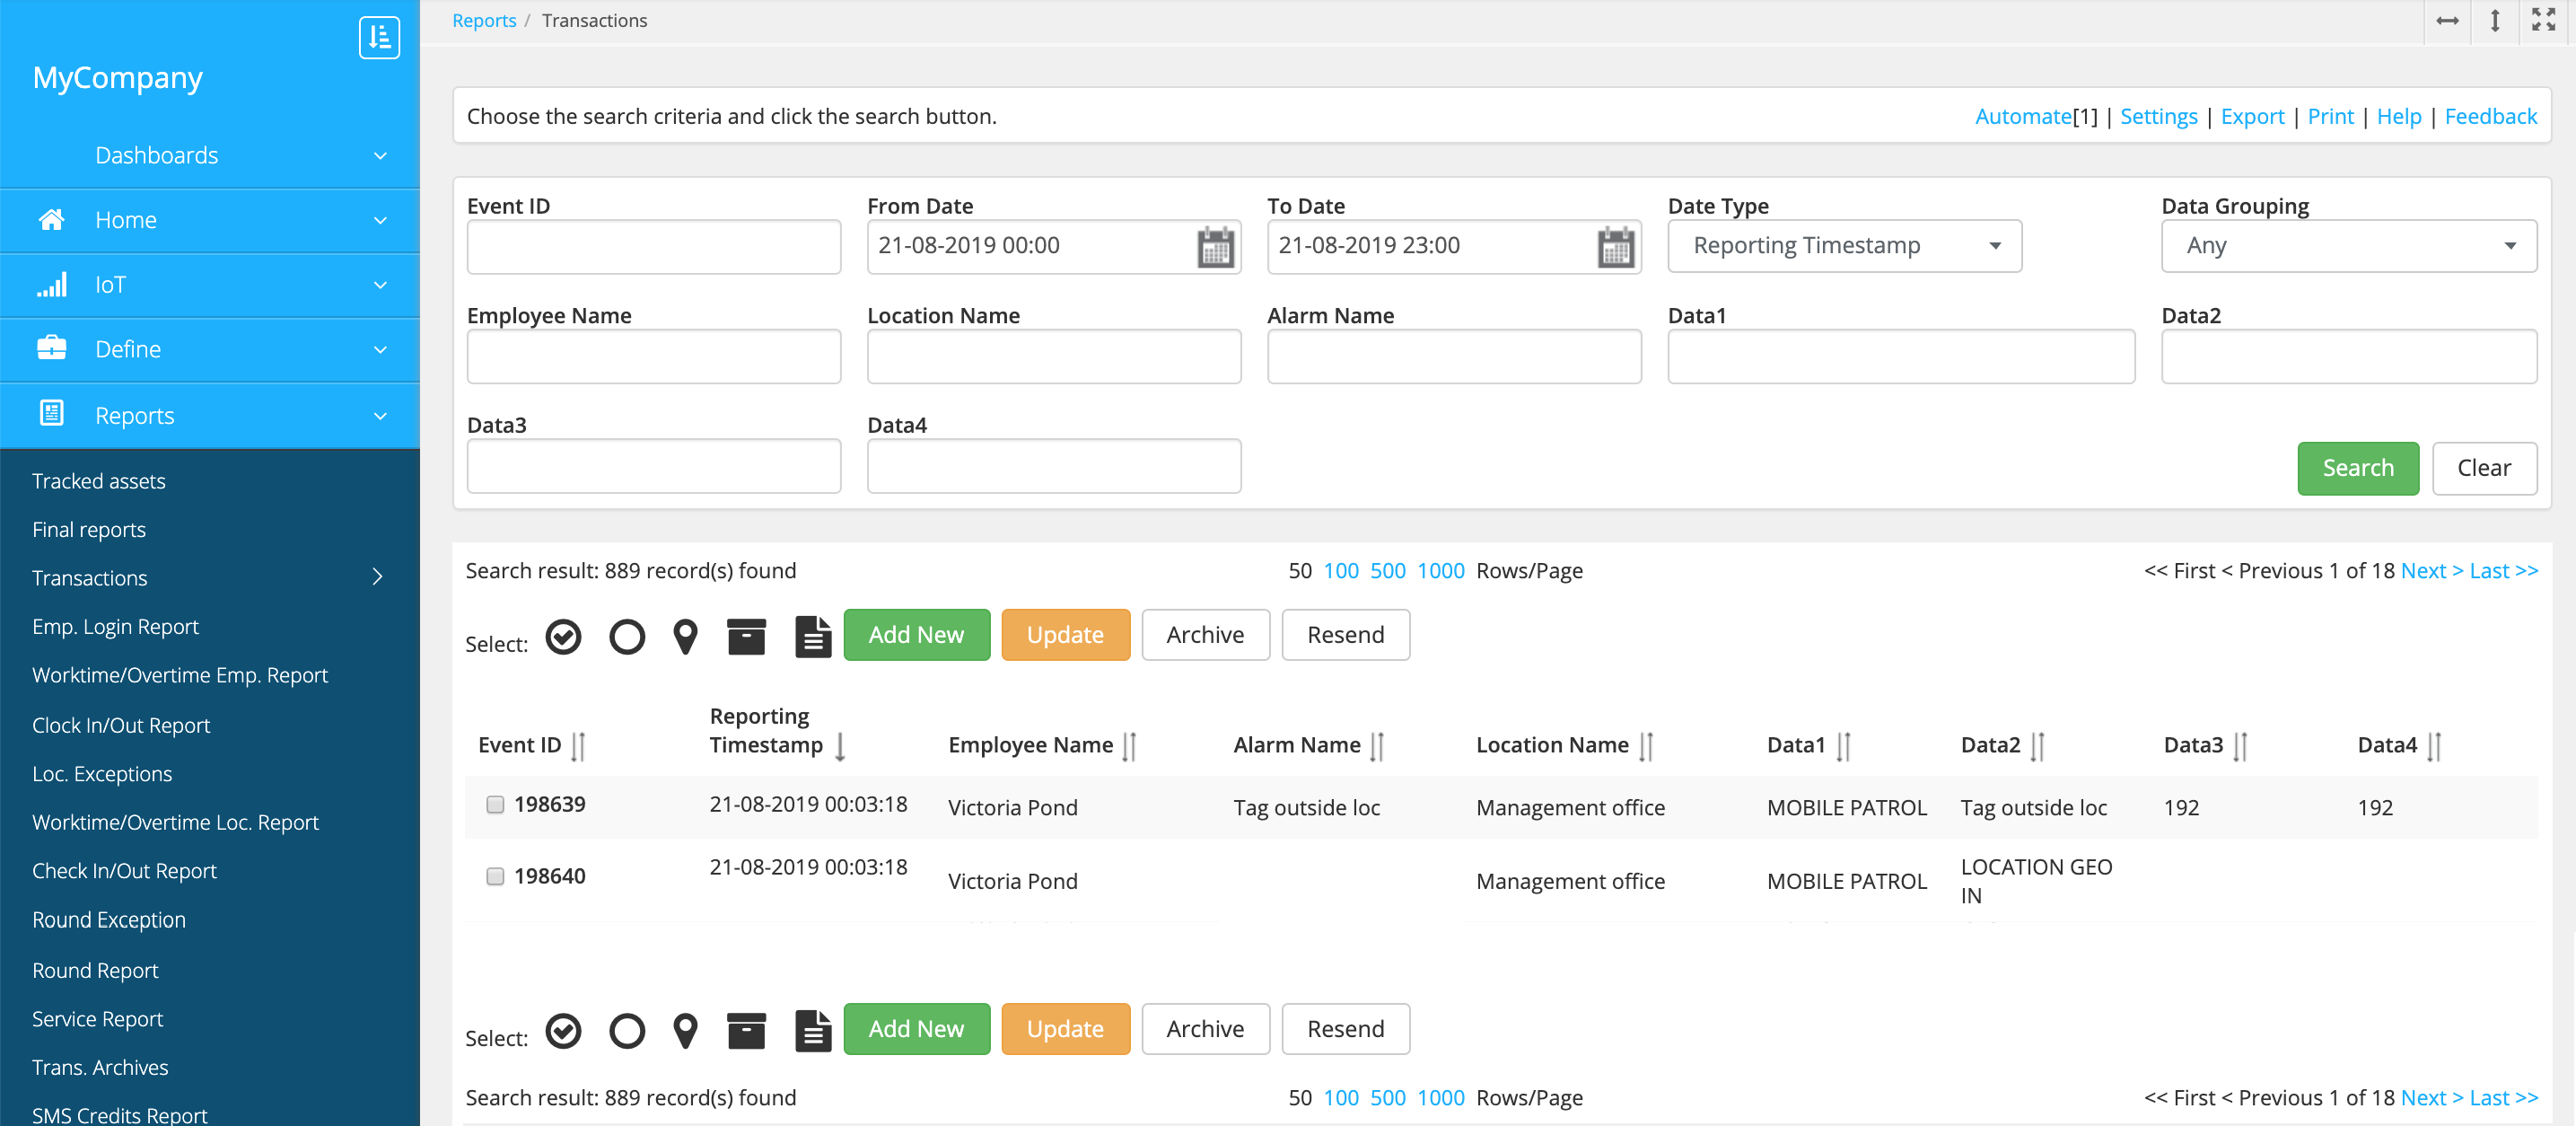
To specify the triggering transaction in the alarm settings, enter the data fields content in the Alarm name field. For example, "Tag outside loc". To match two or more data fields, enter them separated with a comma.
-
Enable pop-ups in the Pop-up type field:
- Message pop-up includes the Alarm name.
- Map pop-up includes the map with the transaction information on it.
-
Save the alarm.
Set up the alarm resolution reasons
The alarm pop-up contains the Reason field that can be used when resolving the situation. The reasons are selected from the drop-down list. To create the options for the dropdown, go to and add statuses with "Alarm-based" status type.
Send a message to the user
As you receive the alarm, you can write a message to the user. To do this, go to , choose the alarm and click Message above the list.
Resolve alarms
To resolve an alarm, choose the Reason, enter the comment and close the window. You can also resolve the alarm later: go to the page and click the Resolved flag in the alarm list.
View alarm history
The alarm history is shown on the page and in the Alarm report. You can configure the page settings to include the resolution reason and comment: