
Install the sensors
Watch our tutorial video on how to link sensors:
Sensor installation is easy and takes only several minutes. Once you installed the sensor, it starts feeding the readings to the Reslink platform and you can view the data in the web service.
To install a sensor, you need to register in the Reslink platform and then activate it on the spot where it is going to be used.
Before the sensor installation, make sure you have set up:
Register sensor
To register a sensor:
- Install the Reslink app.
- Open the app and tap Register Sensors. Fill in the
fields:
- Sensor ID — Scan the QR code on the sensor. For the Thingsee sensors, the QR code contains the sensor ID and sensor type. For the Sigfox sensors, the QR code contains the sensor ID and PAC (Porting Authorization Code).
- Description — The sensor name.
- Sensor type — Select the sensor type, Sigfox or Default (for the Thingsee sensors).

- Tap Register
After you register a sensor, a record for it is created in the Reslink web service ().
Activate sensor
To activate the sensor on the spot:
- Install the sensor on the spot following the producer guidelines: see instructions for Thingsee and Sigfox.
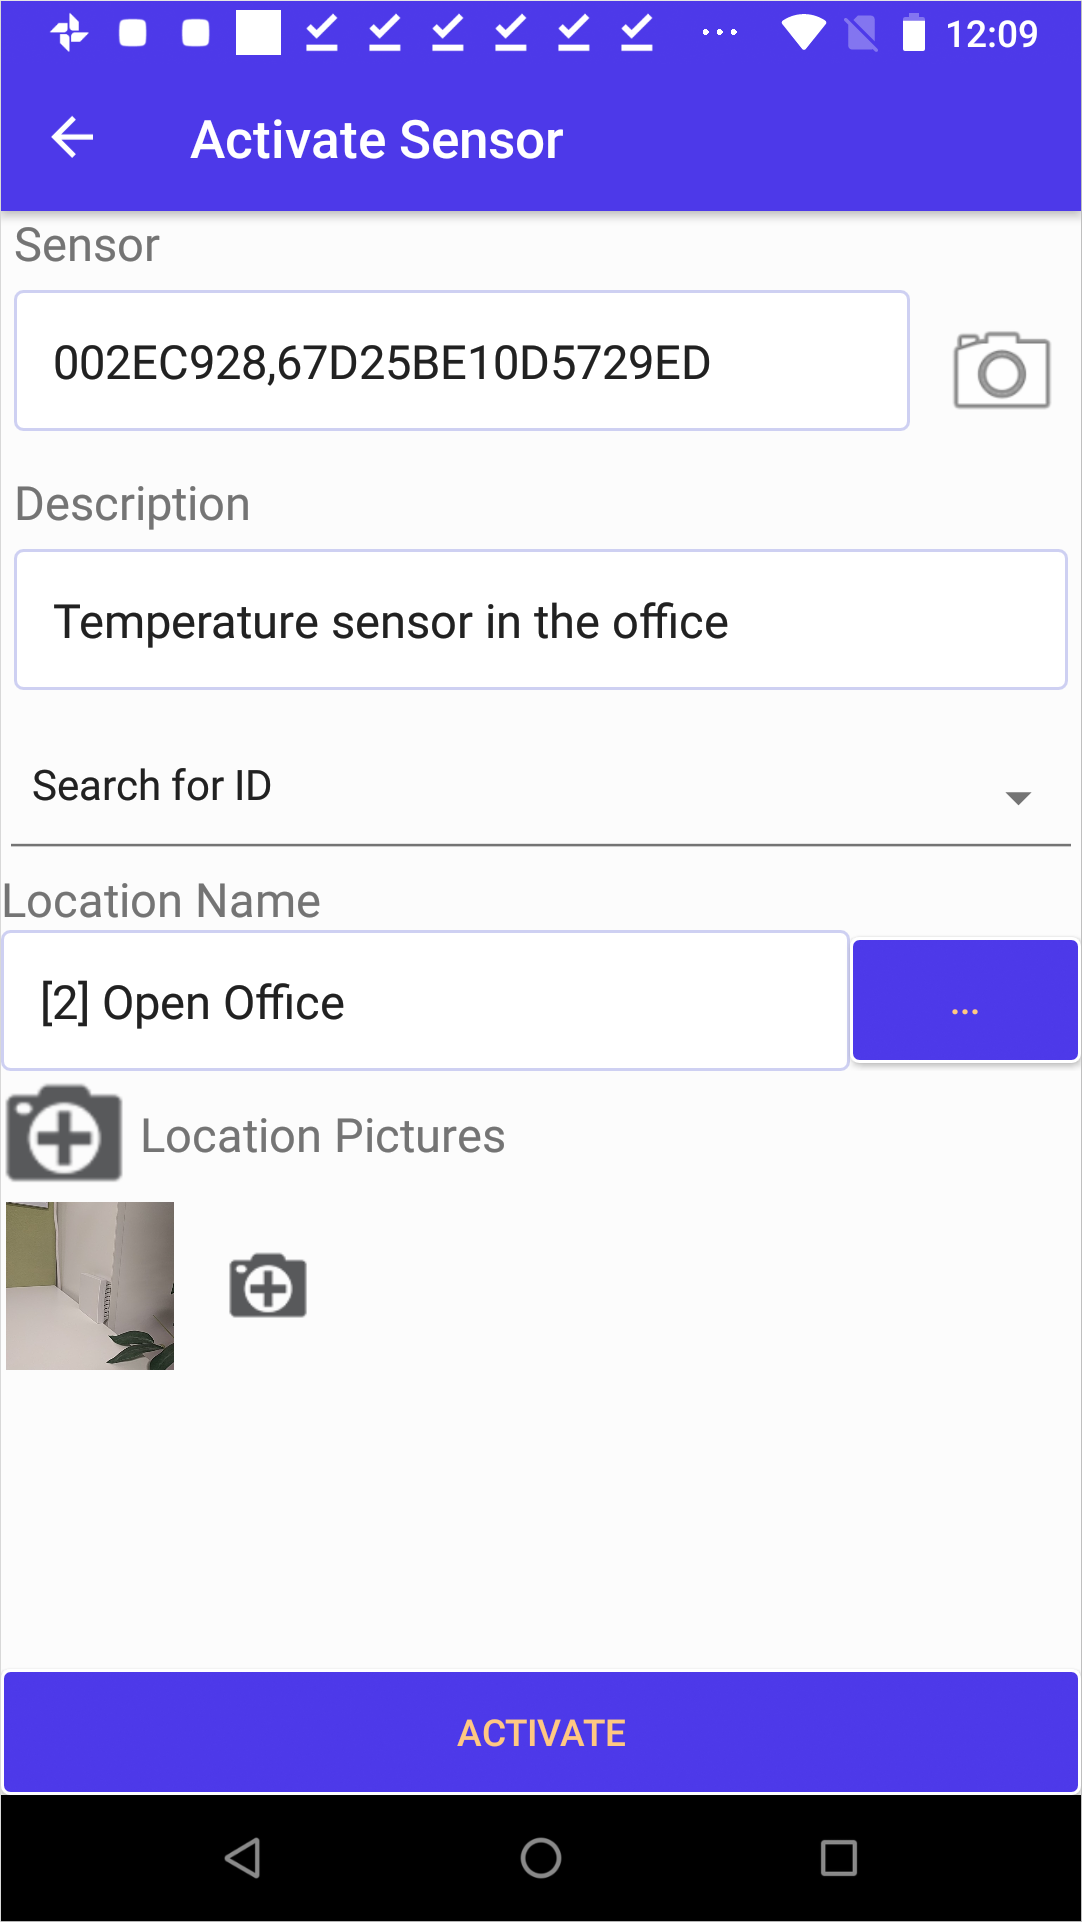
- Tap Activate Sensors in the Reslink app and fill in the
fields:
- Sensor — Scan the QR code on the sensor. For the Thingsee sensors, the QR code contains the sensor ID and sensor type. For the Sigfox sensors, the QR code contains the sensor ID and PAC (Porting Authorization Code).
- Description — Activation note, for example, instructions on how to find the sensor at the location.
- Location Name/ID — The name or ID of the location where you install the sensor.
- Location Pictures — Photos of the sensor attached at the location.
You can find the sensor record in the Reslink web service ():