
List stock assets
To start tracking the assets, make an asset list for every stock. It can be done either in the web service or in the Asset management app by reading a QR code. In the app, the steps for listing tracked and untracked assets are the same. In the web service, the procedures are different.
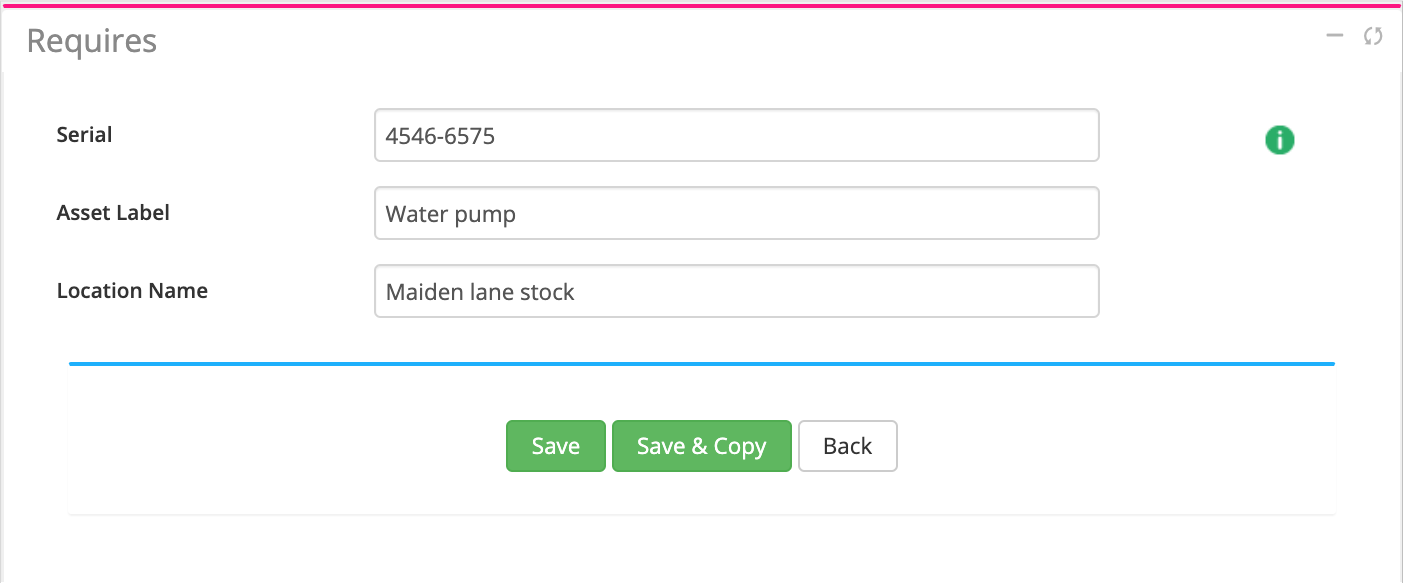
Add tracked assets in the web service
-
Go to the page and click Add new.
Enter the serial number, asset label and stock name.
-
Click Save to add the asset item to the stock.
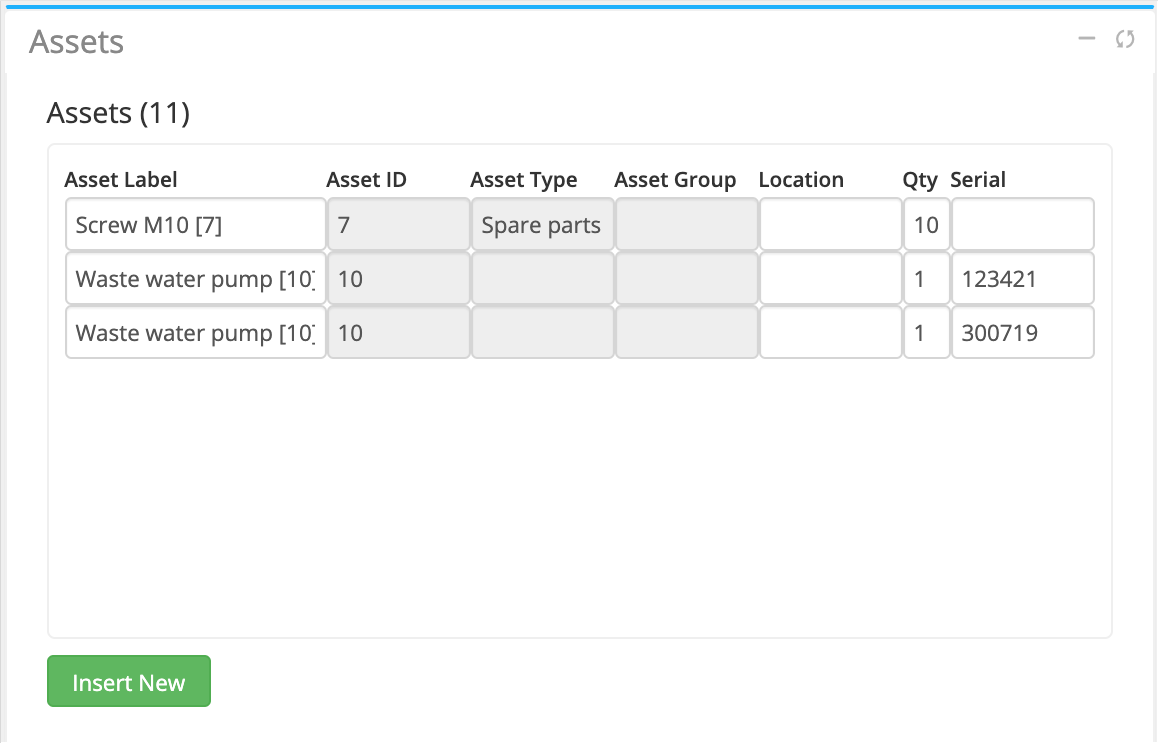
Add untracked assets in the web service
To make a list of untracked assets in the stock:
-
Go to the page and choose the stock.
In the Assets block, add the assets that belong to the stock. Press the space bar in the Asset name field to choose from the list of assets. Fill in the asset properties:
- Location (Optional) – A note about where to find the items, for example "Shelf 11.45.3".
- Qty – The quantity of this asset stored in the stock.
To remove an asset from the stock, enter zero in the Qty field.
-
Click Update to save the asset list.
Upload stock assets in .xls file
You can upload assets in the .xls file. To do this, go to the page and use the import instructions to create and upload the file.
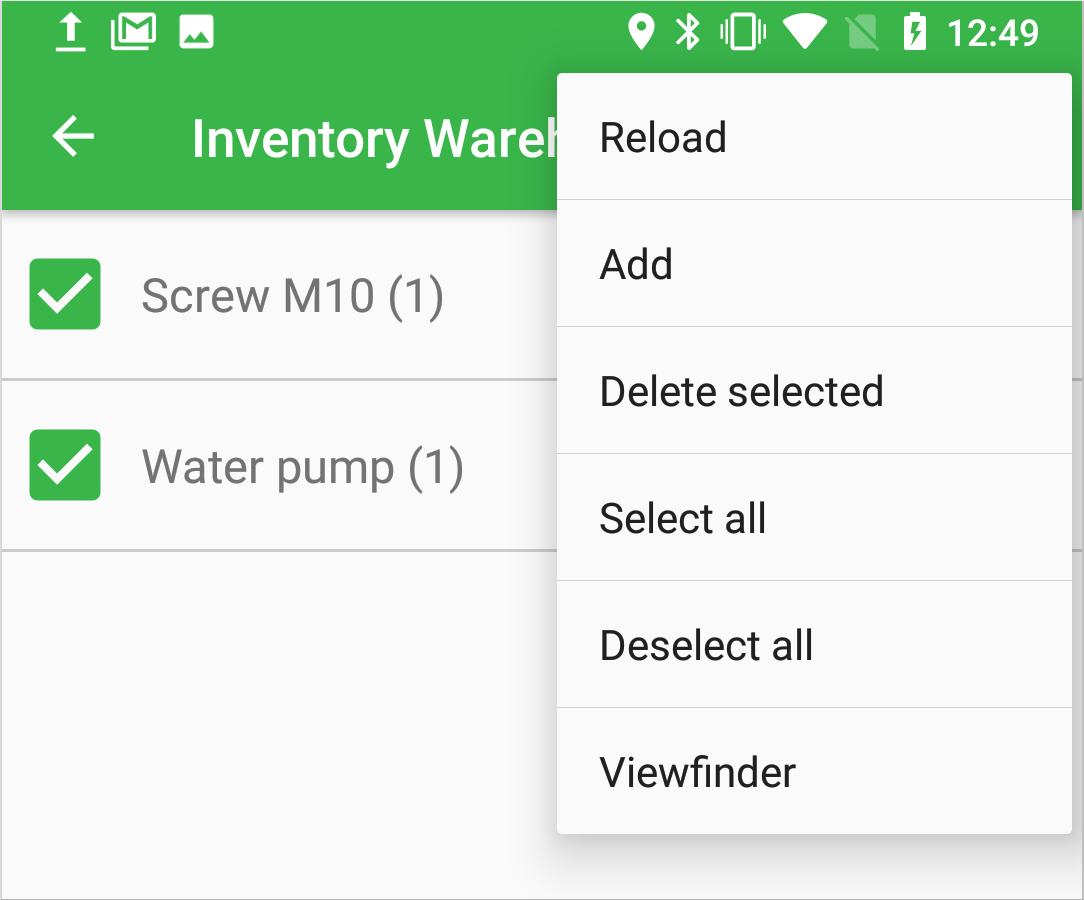
Make asset list in the app
To make a list of assets in a stock with the Asset management app, scan the asset QR codes:
-
Print out QR codes: go to the page in the web service, choose the asset label and click the QR code icon
 above the list.
 -
Install the app on the device.
-
On the spot, open the app and choose the warehouse you are in ().
Tap , choose Viewfinder in the upper right corner menu and scan the asset label QR code.
-
If the asset is tracked, add a unique ID.
-
Repeat steps 4 and 5 to add more assets to the list.
-
Send the list with the
 button.